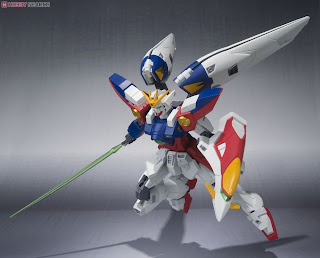
This is a gunpla checklist for the Gundam W series. I made this post to help those gunpla collectors in knowing how many model kits are there in the series and what models are available for each scale. This series first focused on the HG 1/100. But now their starting to get MG 1/100 scales to meet the demands of the fans. As of now there are a total of 71 model kits for the Gundam W series. Overall, this is a great series to collect. It's very popular to the fans, especially the Gundam Wing Zero Custom. I will update the list when Bandai releases a new model kit.
SD EX-Standard (2)
#04 Wing Gundam Zero EW
#12 Gundam Deathscythe Hell EW
1/200 Speed Grade (1)
- Wing Gundam
1/144 NG ver. WF (12)
01 - Wing Gundam
02 - Shenlong Gundam
03 - Gundam Deathscythe
04 - Gundam Heavy Arms
05 - Gundam Sandrock
06 - Tallgeese
07 - Vayeate
08 - Mercurius
09 - Wing Gundam 0
10 - Gundam Epyon
11 - Altron Gundam
13 - Tallgeese II
12 - Gundam Deathscythe Hell
1/144 HG G-Unit (5)
01 - Gundam Geminass
02 - Gundam Aesculapius
03 - Gundam L.O. Booster
04 - Hydra Gundam
05 - Gundam Griepe
1/144 HGFA (14)
01 - W Gundam Zero Custom
02 - Tallgeese III
03 - Gundam Nataku
04 - Gundam H-Arms Custom
05 - Gundam D-Hell Custom
06 - Serpent Custom
07 - Gundam Sandrock Custom
- W Gundam Zero Custom (Metal Clear Ver.)
- Gundam D-Hell Custom (Metal Clear Ver.)
- Gundam Nataku (Metal Clear Ver.)
- Gundam Sandrock Custom (Metal Clear Ver.)
- Gundam H-Arms Custom (Metal Clear Ver.)
- Tallgeese III (Metal Clear Ver.)
- Serpent Custom (Metal Clear Ver.)
1/144 HGAC (2)
162 - Wing Gundam
174 - Wing Gundam Zero
1/144 RG (2)
#17 Wing Gundam Zero Custom (EW)
#20 Wing Gundam EW
1/100 HG (15)
W-01 Wing Gundam
W-02 Shenlong Gundam
W-03 Gundam Deathscythe
W-04 Wing Gundam 0
W-05 Gundam Epyon
W-06 Altron Gundam
W-07 Gundam Deathscythe Hell
EW-01 Gundam Nataku
EW-02 W Gundam Zero Custom
EW-03 Tallgeese III
EW-04 Gundam H-Arms Custom
EW-05 Gundam Deathscythe Hell Custom
EW-06 Gundam Sandrock Custom
EW-07 Serpent Custom
EW-S W Gundam Zero Custom (Special)
1/100 High-Resolution Model (1)
- Wing Gundam Zero EW
1/100 MG (14)
- Wing Gundam
- W Wing Gundam (Ver. Ka)
- W Wing Gundam (EW Ver.)
- Wing Gundam Proto Zero (EW Ver.)
- Wing Gundam Zero Custom
- Wing Gundam Zero Custom (w/ Clear Kit)
- Gundam Deathscythe (EW Ver.)
- Gundam Deathscythe Hell Custom (EW Ver.)
- Shenlong Gundam (EW Ver.)
- Gundam Epyon (EW Ver.)
- Gundam Sandrock (EW Ver.)
- Gundam Heavyarms (EW Ver.)
- Tallgeese I (EW Ver.)
- Gundam Heavyarms Custom (EW Ver.)
1/60 NG (1)
- Wing Gundam 0
1/60 PG (2)
- W Gundam Zero Custom
- W Gundam Zero Custom (Special Ver.)
.


.jpg)


